

At long last, here's everything you need to know about making your own kegerator to enjoy fresh, ice-cold beer on-tap in your own home (or garage, as the case may be).
It's really not that difficult. There are three main challenges to overcome in order to make this a reality and be the envy of your neighborhood:
1) Persuade your wife to let you have your own kegerator.
2) Persuade your wife to let you have your own kegerator.
3) Persuade your wife to let you have your own kegerator.
I can't emphasize this enough. It is, by FAR, the one reason that all of us don't already have a kegerator, am I right? So first, some tactics to deal with that:
Kegerators cost money. They're big, ugly (usually), and our better halves don't usually understand our need or want for one of these things. Luckily, my wife is a saint, and just said "Ok", the first time I brought it up, so I don't have too much experience here, but I'll try to help. The big/ugly part is easy. Just tell her it will go in your garage (after all, that's the only room in the house we really have any say over, right?). So the location shouldn't be that much of an issue.
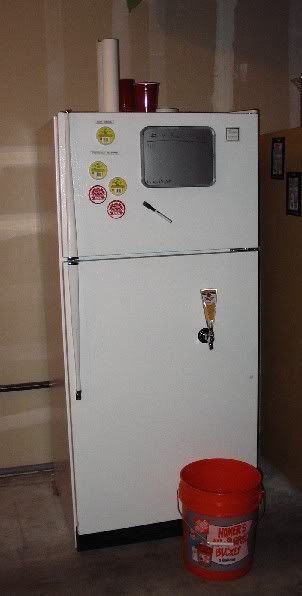
It's usually not that hard to find a working fridge for free or cheap. It doesn't have to be the prettiest fridge at the prom, so long as it will get the job done. One word of caution here...my original kegerator was
![]()
this beast from the early 70s, and I quickly discovered that it took about $25-$30 a month just for the electricity to run it. So I'd recommend getting a very energy efficient one, otherwise it's going to be too expensive in the long-run.
Another good selling point is that it will save money in the long-run. (technically, this might not actually be true because of electricity and CO2 costs, but just comparing the cost per pint from a keg and a bar, or cost per 12oz from a keg, vs bottles, the keg is cheaper most of the time).
For example, a quarter-barrel holds 992 ounces, and a half-barrel holds twice that. I always get the quarter-barrel. 992 ounces = 62 pints, or just over 88 bottles (almost 14 six-packs). So, it's highly dependent on what beer you want to buy...if I get Red Hook, that's $70 for a quarter-barrel, or a little more than $1/pint. I can get Bud, Miller, etc for $45 per quarter-barrel, so it's about 73 cents per 16oz pint, or about 54 cents per 12oz bottle. That's cheaper than even the grocery store, let alone bars.
One last tip on this matter - my wife loves my kegerator, because she can fill up what's left in the fridge part, plus the entire freezer with stuff she wants to freeze. Women love to freeze stuff. Freezer-jam, extra stuff they buy on sale, all sorts of stuff. So the extra freezer space might be a good selling point. Or it might be time to work a deal on that new (*insert that special something your wife has always wanted here*) your wife has been longing for....
Ok, after you get your wife's blessing, the rest is cake.
Step 1 - Order your kegerator parts - I recommend www.beveragefactory.com They have fast shipping, reasonable prices on high-quality equipment, and excellent customer service, including real people you can call up and ask questions to if something isn't going as planned. (For instance, cleaning the tap is a little tricky sometimes). There are many places that sell this equipment. Basically, you will need the following, minimum:
a tap
a faucet
proper beer line tubing
CO2 tank
regulator
CO2 hose
shank
cleaning materials
www.beveragefactory.com sells these as complete kits for around $200 - including a brand new CO2 tank. This is the bulk of your $$$ outlay right here. This is mostly personal preference, but I recommend getting a new aluminum CO2 tank, because the steel ones will rust in your fridge, but either will work. I also recommend a dual-gauge regulator, since that will tell you how much CO2 you have left. And you want the "Sankey" tap for almost all American beers. If you are an import beer snob, you might need a different tap, among other things...
Step 2 - Find a fridge - (You can get a freezer too, but then you need an external thermostat control for about $50, which will get it to operate at fridge temperature) My first kegerator was a freezer-on-bottom model, which is perfect, but it's hard to find newer models for cheap. Whatever you decide to go with, make sure it's big enough to hold whatever size keg you plan on using. Height isn't an issue with most kegerators, but if you plan on getting full-size kegs, it might be. Those are usually 23-24" tall, and you need some extra clearance for the tap and tubing. But mainly, you need to think about width and depth. Most kegs (yes, they vary) are about 15-17" in diameter. Just make sure you can fit something with a 17" diameter inside (with the door closed), and you should be good to go. Also remember that you should always move a fridge upright, or you can damage the compressor.
Step 3 - Drilling the door - Placement is key. Here is the inside of my original kegerator's door panel:
![]()
As you can see, you need to position the hole so that there are no annoying trays, cubbies, or any other inside-door features in your way. And you want more room than I had with this one, because you need to get a large wrench in there to tighten everything down. I didn't think about that at first, and it made it 10 times harder than it needed to be. Also, I had to remove the railings and such so that the keg fit, which is why they're not there.
I went with the 5 and 1/8" long shank, because that will fit through any size fridge door, and if it sticks out a little on the inside of the door, who cares? Now, most shanks say they need a 1" hole. However, a 1" hole is a little bit bigger than it needs to be. Also, you should put a piece of PVC tubing inside the door too, and the shank inside of that. The PVC tube comes with the kits from BeverageFactory. Here's what I did: I bought a 7/8" metal-cutting hole saw (don't know if the ones designed for wood cutting would do a good job or not). Then, you want to mark the exact spot you're going to drill, on the outside of the door. Drill straight through, with just a normal 1/4" bit, as level as you can. Then, using your hole saw, centered on the 1/4" hole, drill halfway through from the outside of the door, and then halfway through from the inside of the door.
Now you should have a suitable 7/8" hole. Then what I did is just took my dremel and went along by hand, making the hole a little bit bigger on both sides until the PVC tubing fit through the hole. Then, you just cut the PVC tube to length, and slide the shank in, and tighten with the nut on the inside of the door. The PVC tube is important, because otherwise, when you tighten the nut for the shank, instead of tightening, you'll just start compressing and warping the fridge door. Also, you want to make the PVC tubing just a little shorter than the width of the door, so it doesn't tighten onto the PVC tube and spin freely, because it's not attached to the door itself. Here you can see the outside of my original kegerator's door hole. Notice the stray marks from my probably not good enough dremel skills. (These aren't visible once everything is put together)
![]()
Step 4 - Putting it all together - Now you're pretty much ready to go. You want to thoroughly clean all tubing, tap, faucet, etc with Beer Line Cleaner prior to first use, and at least in between every keg, also. (I'll talk about cleaning later). Then just put your shank in, attach the tubing to the shank and tap, the CO2 tubing to the tap, and attach your faucet, etc. Oh, and the CO2 tank needs to be upright at all times, and should probably be anchored with a bungie-cord inside your fridge, if possible. And obviously you need to get your CO2 tank filled too. I do that at an industrial gas place near my house. If you get the 5lb tank, that should last for about 12-15 quarter-barrel kegs, or half that many regular size kegs.
Step 5 - the fun begins! - Go get your keg!! These vary wildly in price, and it all just depends on if you want something like Bud, Miller, Coors, or a small microbrew, etc. Keep in mind that microbrews don't stay fresh for as long as the more processed beers. Once you get that sucker home, put it in your fridge, and you don't want to tap it for 2-3 hours, because it got all shook up in your car on the way home, and it needs to settle. It sucks waiting, but it's worth it. Then, just turn on your CO2 to the proper pressure (usually around 12-14psi), make sure your faucet is in the off position, and tap your keg.
Here are a couple pics of the inside of my new kegerator (sorry for the image quality...I had to reduce them a lot so they wouldn't break the page). I'm using a small clamp instead of a wrench on the shank nut, because it needs to be tightened every once in a while, and it's just easier this way. It's also a good idea to have a thermometer in there to make sure it's the right temperature (usually around 35-36 degrees).
![]()
![]()
Oh yeah...notice the plywood under the keg? I've found that it's best if possible to do something like this to help support the weight. The shelf under my new keg is glass, and it's pretty bendy with all that weight on it. But the plywood sits on the supports for the shelf, so most of the weight now rests on those supports instead of the glass, so I don't have to worry about it breaking. There's little things like that to think about, too.
Step 6 - Adjust psi - This is the trickiest part, and I still don't have it all figured out. Different beers have different "dissolved volumes of CO2". If you don't have enough psi on the beer, then CO2 will "break out" of your beer, and it will eventually go flat. If the psi is too high, your beer will eventually get overcarbonated. There is a great page [a href="http://www.angelfire.com/ks2/beer/homekeg.html>here with a TON of information about CO2 levels.
A good tip is to ask the brewer what psi and temperature you should store your beer at to keep it at its best. For instance, Red Hook, a local microbrew here, said that the psi should be at 6 when you're not using it, up around 12-14 when it IS in use, but that the best thing is just to untap the keg when it's not in use to preserve the original CO2 content. Well, that is just a major pain in the butt. I did a whole keg where I'd turn on CO2, tap it, pour a beer, untap it, turn off CO2 every time. It did probably keep it better longer, but was just too much work.
The folks at Miller Brewing said that for MGD, it should be about 34-36 degrees, and 13-14 psi, and you can leave it hooked up, and that should be fine. I'm trying that now, with my latest keg, and I'm still getting too much foam (which can mean too much OR too little pressure). Another thing though is to not get too discouraged. If you leave it hooked up, and it starts going flat, just purge the tank (there's instructions with your kit...basically, just pull the release valve, allowing the pressurized CO2 to escape the keg), set your psi 2-3 higher than before, and let it pressurize at the higher pressure, and it will re-carbonate your beer to a degree. Opposite if it's over-carbonated. This is definitely the trickiest part, and takes some tinkering. Also, the regulator reads a little funny if you have your CO2 tank in the fridge like I do, so just figure out what works best for your kind of beer and stick with it. If you change beers a lot like I do...it's kind of tough, cause they're all different.
Also, I've found that the beer that sits in the line for a while comes out extra-foamy. So, like the first beer of the night, I'll usually just put the first little bit into a disposable cup, because it's mostly foam, and then start pouring into my actual glass.
Step 7 - Cleaning and maintenance - At LEAST once a week, you want to rinse out your tap, faucet, and beer line with fresh water. Here's the short version on how this is done quickly, and without wrenches, etc:
Untap your keg. Open faucet and let any beer drain that will drain. Remove faucet, and in the open position, let water flow through it from a sink. Fill up your pump with fresh tap water (you DID get the cleaning kit with the pump, right?), and attach it to the shank where the faucet normally goes. Stick something up inside the tap to unblock the check valve in there. I use a bent up metal coat hanger. Hold it in there while someone else pumps the clean water through the system, and out into a bucket. (You'll notice I have a bucket under my faucet anyway. This is to catch the extra little drips that come out after you finish pouring. You can get a fancy-pants drip tray that you screw onto the door, but why pay like $45 for one of those when you can use a bucket??)
Then, you're done. Detach the pump, reattach the faucet, retap your beer, and you're good to go. Like I said, at least once a week with that quick rinse.
You want to use Beer Line Cleaner (BLC) between kegs. This is a caustic cleaner that removes any deposits, etc, that might have started to build up. It's a more involved process, but here's the gist: Basically the same as before, except unscrew the beer line from the tap (need a wrench, as that part should be wrench-tight), and soak your tap and disassembled faucet (there's about 6-7 pieces to your faucet, including washers/gaskets, take it entirely apart and soak it all) in the solution of BLC and HOT water. Pump the solution through the beer line and shank, and at some point, plug up the hole, and let the BLC solution soak in the lines for a few minutes. Then follow up with a pump through of clean, cold water to get rid of the nasty caustic cleaner so you don't drink that. Scrub off the parts you were soaking, rinse in tap water, and let dry. Then reassemble everything and put it all back on the kegerator, and you're ready for your next keg!
That's about all for now. Here's the pictures you have been waiting for. This is my new Kegerator 2.0, and me getting a Cold One from it the other night, after kicking your butts in that tourny on the new maps :twisted:
![]()
Oh, one more thing. I almost forgot fun customizations/ideas....For every keg I get, I use carpet tape to stick a little magnet on the underside of the plastic thingy that comes with the keg. Then I have an area on the fridge called "Now Serving", so people know what's in there, and all the old ones are up there too. Also, I have a dry-erase board titled "Number of beers drunk", and ask people to please put a tally mark for every pint they get. It's obviously not very accurate, since I don't want to be a nazi about it, but it gives me some idea of when it's getting close to empty.
Also, the tap handle that comes with the kits is freaking lame. Just a small, black plastic thingy. I bought a 5.5" tall Miller High Life tap handle from ebay for like $8 that is quite nice. The taller, bar-style ones won't work - because of the angle when closed, they hit the fridge and your faucet won't turn off. You can actually get another angled thing that fixes this, but it looks kind of funny. I'd stick with just getting the shorter tap handles.
If any of you get a kegerator of your very own, please let me know how it goes!
- scottamus
1) Persuade your wife to let you have your own kegerator.
2) Persuade your wife to let you have your own kegerator.
3) Persuade your wife to let you have your own kegerator.
I can't emphasize this enough. It is, by FAR, the one reason that all of us don't already have a kegerator, am I right? So first, some tactics to deal with that:
Kegerators cost money. They're big, ugly (usually), and our better halves don't usually understand our need or want for one of these things. Luckily, my wife is a saint, and just said "Ok", the first time I brought it up, so I don't have too much experience here, but I'll try to help. The big/ugly part is easy. Just tell her it will go in your garage (after all, that's the only room in the house we really have any say over, right?). So the location shouldn't be that much of an issue.
It's usually not that hard to find a working fridge for free or cheap. It doesn't have to be the prettiest fridge at the prom, so long as it will get the job done. One word of caution here...my original kegerator was
this beast from the early 70s, and I quickly discovered that it took about $25-$30 a month just for the electricity to run it. So I'd recommend getting a very energy efficient one, otherwise it's going to be too expensive in the long-run.
Another good selling point is that it will save money in the long-run. (technically, this might not actually be true because of electricity and CO2 costs, but just comparing the cost per pint from a keg and a bar, or cost per 12oz from a keg, vs bottles, the keg is cheaper most of the time).
For example, a quarter-barrel holds 992 ounces, and a half-barrel holds twice that. I always get the quarter-barrel. 992 ounces = 62 pints, or just over 88 bottles (almost 14 six-packs). So, it's highly dependent on what beer you want to buy...if I get Red Hook, that's $70 for a quarter-barrel, or a little more than $1/pint. I can get Bud, Miller, etc for $45 per quarter-barrel, so it's about 73 cents per 16oz pint, or about 54 cents per 12oz bottle. That's cheaper than even the grocery store, let alone bars.
One last tip on this matter - my wife loves my kegerator, because she can fill up what's left in the fridge part, plus the entire freezer with stuff she wants to freeze. Women love to freeze stuff. Freezer-jam, extra stuff they buy on sale, all sorts of stuff. So the extra freezer space might be a good selling point. Or it might be time to work a deal on that new (*insert that special something your wife has always wanted here*) your wife has been longing for....
Ok, after you get your wife's blessing, the rest is cake.
Step 1 - Order your kegerator parts - I recommend www.beveragefactory.com They have fast shipping, reasonable prices on high-quality equipment, and excellent customer service, including real people you can call up and ask questions to if something isn't going as planned. (For instance, cleaning the tap is a little tricky sometimes). There are many places that sell this equipment. Basically, you will need the following, minimum:
a tap
a faucet
proper beer line tubing
CO2 tank
regulator
CO2 hose
shank
cleaning materials
www.beveragefactory.com sells these as complete kits for around $200 - including a brand new CO2 tank. This is the bulk of your $$$ outlay right here. This is mostly personal preference, but I recommend getting a new aluminum CO2 tank, because the steel ones will rust in your fridge, but either will work. I also recommend a dual-gauge regulator, since that will tell you how much CO2 you have left. And you want the "Sankey" tap for almost all American beers. If you are an import beer snob, you might need a different tap, among other things...
Step 2 - Find a fridge - (You can get a freezer too, but then you need an external thermostat control for about $50, which will get it to operate at fridge temperature) My first kegerator was a freezer-on-bottom model, which is perfect, but it's hard to find newer models for cheap. Whatever you decide to go with, make sure it's big enough to hold whatever size keg you plan on using. Height isn't an issue with most kegerators, but if you plan on getting full-size kegs, it might be. Those are usually 23-24" tall, and you need some extra clearance for the tap and tubing. But mainly, you need to think about width and depth. Most kegs (yes, they vary) are about 15-17" in diameter. Just make sure you can fit something with a 17" diameter inside (with the door closed), and you should be good to go. Also remember that you should always move a fridge upright, or you can damage the compressor.
Step 3 - Drilling the door - Placement is key. Here is the inside of my original kegerator's door panel:
As you can see, you need to position the hole so that there are no annoying trays, cubbies, or any other inside-door features in your way. And you want more room than I had with this one, because you need to get a large wrench in there to tighten everything down. I didn't think about that at first, and it made it 10 times harder than it needed to be. Also, I had to remove the railings and such so that the keg fit, which is why they're not there.
I went with the 5 and 1/8" long shank, because that will fit through any size fridge door, and if it sticks out a little on the inside of the door, who cares? Now, most shanks say they need a 1" hole. However, a 1" hole is a little bit bigger than it needs to be. Also, you should put a piece of PVC tubing inside the door too, and the shank inside of that. The PVC tube comes with the kits from BeverageFactory. Here's what I did: I bought a 7/8" metal-cutting hole saw (don't know if the ones designed for wood cutting would do a good job or not). Then, you want to mark the exact spot you're going to drill, on the outside of the door. Drill straight through, with just a normal 1/4" bit, as level as you can. Then, using your hole saw, centered on the 1/4" hole, drill halfway through from the outside of the door, and then halfway through from the inside of the door.
Now you should have a suitable 7/8" hole. Then what I did is just took my dremel and went along by hand, making the hole a little bit bigger on both sides until the PVC tubing fit through the hole. Then, you just cut the PVC tube to length, and slide the shank in, and tighten with the nut on the inside of the door. The PVC tube is important, because otherwise, when you tighten the nut for the shank, instead of tightening, you'll just start compressing and warping the fridge door. Also, you want to make the PVC tubing just a little shorter than the width of the door, so it doesn't tighten onto the PVC tube and spin freely, because it's not attached to the door itself. Here you can see the outside of my original kegerator's door hole. Notice the stray marks from my probably not good enough dremel skills. (These aren't visible once everything is put together)
Step 4 - Putting it all together - Now you're pretty much ready to go. You want to thoroughly clean all tubing, tap, faucet, etc with Beer Line Cleaner prior to first use, and at least in between every keg, also. (I'll talk about cleaning later). Then just put your shank in, attach the tubing to the shank and tap, the CO2 tubing to the tap, and attach your faucet, etc. Oh, and the CO2 tank needs to be upright at all times, and should probably be anchored with a bungie-cord inside your fridge, if possible. And obviously you need to get your CO2 tank filled too. I do that at an industrial gas place near my house. If you get the 5lb tank, that should last for about 12-15 quarter-barrel kegs, or half that many regular size kegs.
Step 5 - the fun begins! - Go get your keg!! These vary wildly in price, and it all just depends on if you want something like Bud, Miller, Coors, or a small microbrew, etc. Keep in mind that microbrews don't stay fresh for as long as the more processed beers. Once you get that sucker home, put it in your fridge, and you don't want to tap it for 2-3 hours, because it got all shook up in your car on the way home, and it needs to settle. It sucks waiting, but it's worth it. Then, just turn on your CO2 to the proper pressure (usually around 12-14psi), make sure your faucet is in the off position, and tap your keg.
Here are a couple pics of the inside of my new kegerator (sorry for the image quality...I had to reduce them a lot so they wouldn't break the page). I'm using a small clamp instead of a wrench on the shank nut, because it needs to be tightened every once in a while, and it's just easier this way. It's also a good idea to have a thermometer in there to make sure it's the right temperature (usually around 35-36 degrees).
Oh yeah...notice the plywood under the keg? I've found that it's best if possible to do something like this to help support the weight. The shelf under my new keg is glass, and it's pretty bendy with all that weight on it. But the plywood sits on the supports for the shelf, so most of the weight now rests on those supports instead of the glass, so I don't have to worry about it breaking. There's little things like that to think about, too.
Step 6 - Adjust psi - This is the trickiest part, and I still don't have it all figured out. Different beers have different "dissolved volumes of CO2". If you don't have enough psi on the beer, then CO2 will "break out" of your beer, and it will eventually go flat. If the psi is too high, your beer will eventually get overcarbonated. There is a great page [a href="http://www.angelfire.com/ks2/beer/homekeg.html>here with a TON of information about CO2 levels.
A good tip is to ask the brewer what psi and temperature you should store your beer at to keep it at its best. For instance, Red Hook, a local microbrew here, said that the psi should be at 6 when you're not using it, up around 12-14 when it IS in use, but that the best thing is just to untap the keg when it's not in use to preserve the original CO2 content. Well, that is just a major pain in the butt. I did a whole keg where I'd turn on CO2, tap it, pour a beer, untap it, turn off CO2 every time. It did probably keep it better longer, but was just too much work.
The folks at Miller Brewing said that for MGD, it should be about 34-36 degrees, and 13-14 psi, and you can leave it hooked up, and that should be fine. I'm trying that now, with my latest keg, and I'm still getting too much foam (which can mean too much OR too little pressure). Another thing though is to not get too discouraged. If you leave it hooked up, and it starts going flat, just purge the tank (there's instructions with your kit...basically, just pull the release valve, allowing the pressurized CO2 to escape the keg), set your psi 2-3 higher than before, and let it pressurize at the higher pressure, and it will re-carbonate your beer to a degree. Opposite if it's over-carbonated. This is definitely the trickiest part, and takes some tinkering. Also, the regulator reads a little funny if you have your CO2 tank in the fridge like I do, so just figure out what works best for your kind of beer and stick with it. If you change beers a lot like I do...it's kind of tough, cause they're all different.
Also, I've found that the beer that sits in the line for a while comes out extra-foamy. So, like the first beer of the night, I'll usually just put the first little bit into a disposable cup, because it's mostly foam, and then start pouring into my actual glass.
Step 7 - Cleaning and maintenance - At LEAST once a week, you want to rinse out your tap, faucet, and beer line with fresh water. Here's the short version on how this is done quickly, and without wrenches, etc:
Untap your keg. Open faucet and let any beer drain that will drain. Remove faucet, and in the open position, let water flow through it from a sink. Fill up your pump with fresh tap water (you DID get the cleaning kit with the pump, right?), and attach it to the shank where the faucet normally goes. Stick something up inside the tap to unblock the check valve in there. I use a bent up metal coat hanger. Hold it in there while someone else pumps the clean water through the system, and out into a bucket. (You'll notice I have a bucket under my faucet anyway. This is to catch the extra little drips that come out after you finish pouring. You can get a fancy-pants drip tray that you screw onto the door, but why pay like $45 for one of those when you can use a bucket??)
Then, you're done. Detach the pump, reattach the faucet, retap your beer, and you're good to go. Like I said, at least once a week with that quick rinse.
You want to use Beer Line Cleaner (BLC) between kegs. This is a caustic cleaner that removes any deposits, etc, that might have started to build up. It's a more involved process, but here's the gist: Basically the same as before, except unscrew the beer line from the tap (need a wrench, as that part should be wrench-tight), and soak your tap and disassembled faucet (there's about 6-7 pieces to your faucet, including washers/gaskets, take it entirely apart and soak it all) in the solution of BLC and HOT water. Pump the solution through the beer line and shank, and at some point, plug up the hole, and let the BLC solution soak in the lines for a few minutes. Then follow up with a pump through of clean, cold water to get rid of the nasty caustic cleaner so you don't drink that. Scrub off the parts you were soaking, rinse in tap water, and let dry. Then reassemble everything and put it all back on the kegerator, and you're ready for your next keg!
That's about all for now. Here's the pictures you have been waiting for. This is my new Kegerator 2.0, and me getting a Cold One from it the other night, after kicking your butts in that tourny on the new maps :twisted:
Oh, one more thing. I almost forgot fun customizations/ideas....For every keg I get, I use carpet tape to stick a little magnet on the underside of the plastic thingy that comes with the keg. Then I have an area on the fridge called "Now Serving", so people know what's in there, and all the old ones are up there too. Also, I have a dry-erase board titled "Number of beers drunk", and ask people to please put a tally mark for every pint they get. It's obviously not very accurate, since I don't want to be a nazi about it, but it gives me some idea of when it's getting close to empty.
Also, the tap handle that comes with the kits is freaking lame. Just a small, black plastic thingy. I bought a 5.5" tall Miller High Life tap handle from ebay for like $8 that is quite nice. The taller, bar-style ones won't work - because of the angle when closed, they hit the fridge and your faucet won't turn off. You can actually get another angled thing that fixes this, but it looks kind of funny. I'd stick with just getting the shorter tap handles.
If any of you get a kegerator of your very own, please let me know how it goes!
- scottamus